
DIY Closet Organizers on the Cheap
DIY Closet Organizers: Cheap and Easy
Update: Wow! I cannot believe how many of you have said you loved these DIY closet organizers. We loved them too so I guess I shouldn't be too surprised though.
Since we created these we had to say goodbye to that rental home in Boulder as life took us on some crazy adventures to Europe, back to the States, and back to Europe again. Looking at this closet, I cannot believe how much stuff we owned. Traveling has made us declutter and minimize so much more and I created a FREE 7-day decluttering challenge. I know you'll LOVE it, if you want to explore living a simplified, fulfilling life.
Back to the original post:
So a few weeks ago in my week 22 baby bump progress post, I alluded to our walk-in DIY closet organizers that we built and installed for my birthday. Well, installation took a little bit longer than expected because I could not help with a lot of the steps like sanding, but within the week they were in and our closet was organized. I cannot tell you how happy they make this nesting mama!
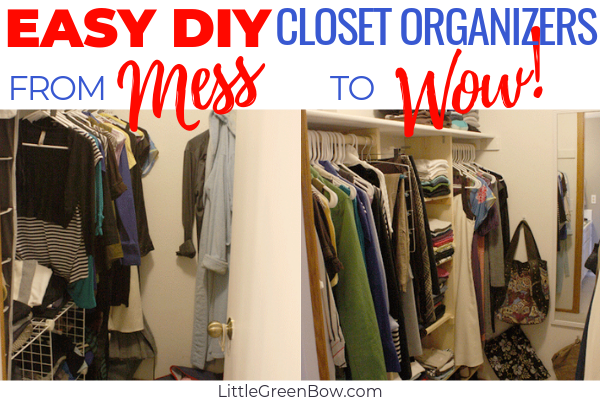
But, don't just take my word for it. Check out the awesome before and after picture below. AWESOME, right?!?!
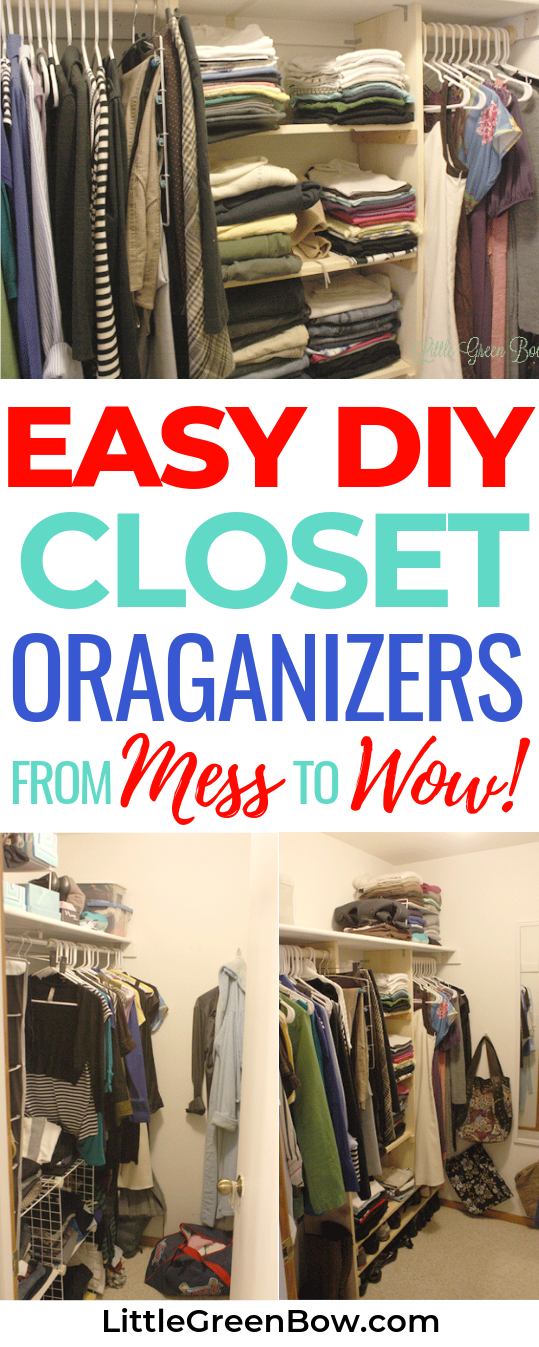
That one's pin-worthy right? If you agree, I would love for you to share the Pinterest love!
So here's how we took our closet from the mess above to that fabulous after photo.
Step 1: Clear everything out!
Here are all of our folded clothes on our bed. What a mess!

Step 2: Prep the closet.
Here's the closet before we started.
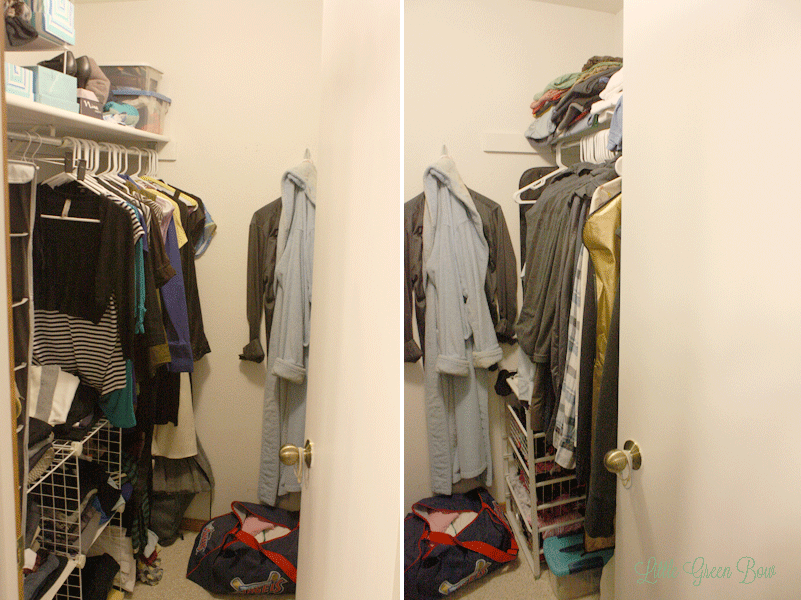
We had to remove the metal bar and support bracket that were there before. Then we removed the door, dusted the shelves, vacuumed and made sure it was completely cleared out.

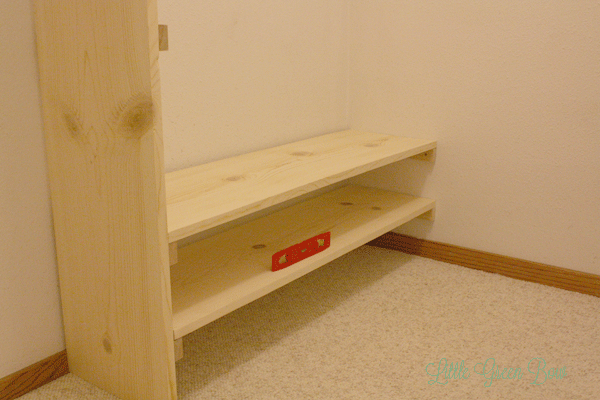
Step 3: Measure and cut all of the pieces
We actually did this before removing everything, but it would work here too. The measurements for this project will need to be customized for your space, but just for reference we used 1" x 12" boards for the upright pieces and shelves. Then we used 1" x 2" pieces cut to 11.5" for the supports. The shelves on the bottom are 6" high and the middle shelves are 12.5" apart.
Step 4: Install the new organizers.
During this step we attached the shelf supports to the upright boards. We also glued the side support boards to the wall and used anchors to secure them to the drywall since we could not find the studs.

Step 5: Organize your clothes.
This might be the most important step. You need to take a serious look at all of the clothes in your closet and decide what should stay and what has seen better days. Once you decide what you want to put back it's time to sort your items. Hanging items are arranged by color and all hung in the same direction.
Folded items were first categorized (short sleeved shirts, long sleeved shirts, sweaters, pants and jeans, work out clothes, etc.) and then also arranged by color.
The same principles were applied to my husband's side of the closet.
We're adding a slight twist to his side though. Since he's a lefty he really wants to hang his shirts facing the other direction. This will help us know which shirts need to be donated after 6 months to a year because when he re-hangs his shirts, they will face the other direction. So, if after that time his shirt is still facing the door, it's time to go!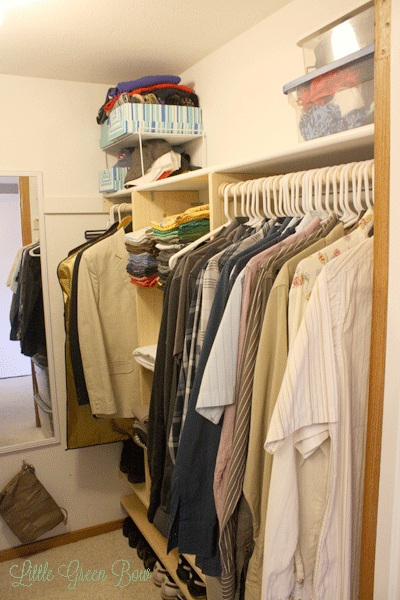
We also hung a mirror and hooks for bags and purses to the back wall of the closet. I love being able to utilize that space!
The two shelves on the bottom are for shoes. They are 6 inches tall, which I found to be plenty of room for our shoes. This was the height of our standard hanging organizers we had before.
Finally, bulkier items like sweaters are put on the top shelf with an additional separator to help keep the stacks manageable. I also put my dressy shoes that I hardly wear anymore in cloth shoe boxes and stacked them on this shelf.
It makes me so happy to have this project done and I love going into my closet now! If only I could just be as in love with my wardrobe, but that's a work in progress.
What do you think? Have you completed an organizing project like this? Or does your closet still need some help? I'd love to hear in the comments below. Also, any tips for keeping it looking this good?
Don't forget to pin this for reference later!
I'm linking here:
Whipperberry | Tatertots & Jello | ShabbyNest | Be Different, Act Normal | Lolly Jane Boutique | 5 Days, 5 Ways | I Heart Nap Time | C.R.A.F.T | Sew Can Do | Keeping It Simple | Under the Table & Dreaming |Skip to My Lou | Nifty Thrifty Things | Petite Hermine | Home Stories A2Z | Romance on a Dime | A Bowl Full of Lemons | Homework | Tip Junkie | Lil Luna | Ginger Snap Crafts | It's Overflowing | The Shady Porch | Uncommon | The Artsy Girl Connection | Today's Creative Blog | One Artsy Mama | Miss Mustard Seed | Classy Clutter | Craft-O-Maniac | Sew Chatty | The Girl Creative | Making the World Cuter | DIY Home Sweet Home | Sugar Bee Crafts | Feathered Nest | KG Style Designs