
Budget Kitchen Update: Midway Point
Remember how I said our kitchen makeover was our biggest DIY project to-date? Well, I wasn't kidding. We might have been crazy to think we could get it done before my mom came for a visit. So here's the truth...we did not get it finished.
That might be a bit melodramatic so let me rephrase. Our kitchen might not be finished and it definitely wasn’t pretty, but at least it was functional. We had working appliances and running water. The water was my biggest fear actually. Living without a sink in the kitchen for two days was more challenging than anticipated, but we got through it.
Let's look at the work I mapped out before for our budget kitchen update. This is the original list of projects for the kitchen with notes as to what was finished when my mom arrived.
- Paint the walls and trim - DONE
- New black appliances (add a dishwasher, which is sorely lacking!) - Installed, but had to fix a small leak while she was here
- Paint the upper cabinets white and add new hardware - Painted, but doors need to be hung
- Build new lower cabinets - Built cabinet boxes, but need to add face frames, drawers, doors and shelves
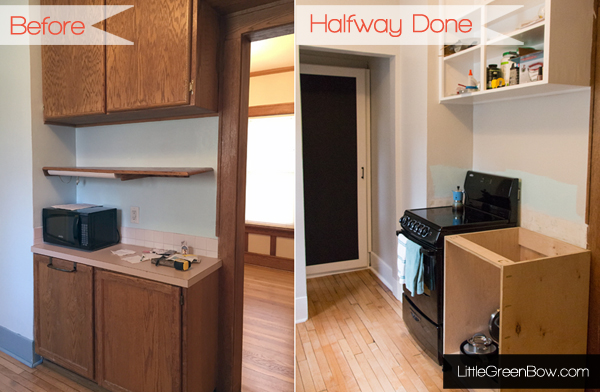
- Move the range to the opposite wall - DONE
- Replace the countertops - Sink side done, but need to add countertop by range
- Replace the sink and faucet - DONE
- New tile backsplash - Not started
- Paint the pantry and add a chalkboard door - Painted, but need to add hardware
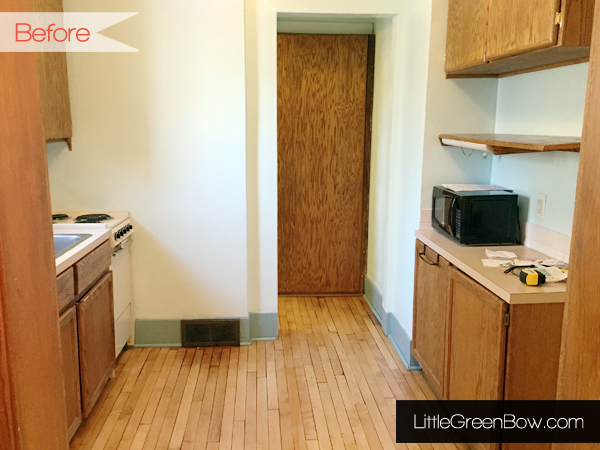
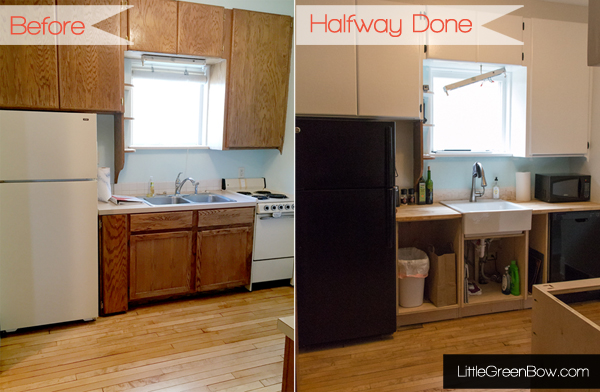
Here are a few photos of our progress. Remember what we started with? It was terrible.
The painting was simple, but tedious and time consuming. Painting the cabinets took one coat of primer and 2 coats of white semi-gloss spread out over 2 weeks so that each area had enough time to cure. These are going to get a beating so I wanted to give them time to “set”.
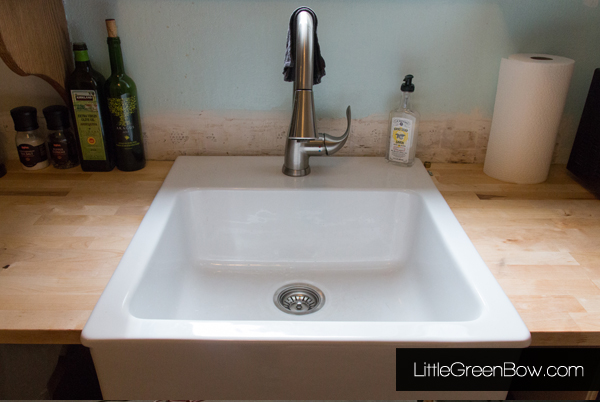
With a little creative thinking for the space planning in our kitchen, we were able to reconfigure the space to make room for a dishwasher and upped the counter space with a small farmhouse sink.
Can I just tell you that I love this sink! So does everyone else who has seen it so far.
Then it was just a matter of planning and building. We figured out how big to make the cabinets based on the measurements of the sink, centering it on the window and placement of the dishwasher.
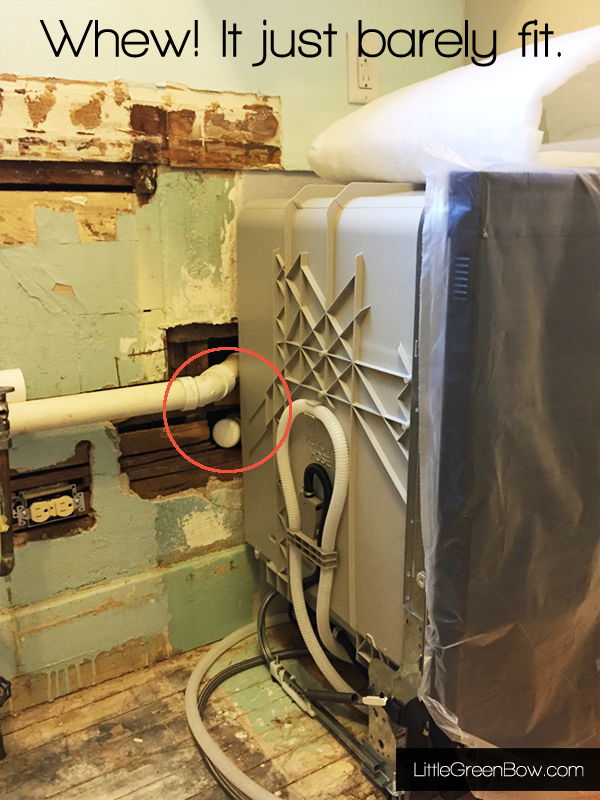
Our original plan included this 18” dishwasher, but when we were at the hardware store buying the other appliances we found a full sized 24” model on sale and went with it. We figured it would cut one small cabinet in half, but it would be more useful to not have to run it every night due to size limitations. It wasn’t until after we got home that we figured out the plumbing might cause an issue.
Fortunately, after capping one of the drain pipes, we discovered a clearance of about 1 inch. Whew!
Part of the project included building our own base cabinets. Of course these took longer to make, but by building them ourselves, it was much easier to customize them for the weird plumbing situation we have going on below the sink.
We had to cut notches out of the small cabinet next to the dishwasher and the under sink cabinet, plus holes in the bottom for the water pipes. It wasn’t super difficult work, but it all took a good amount of brain power.
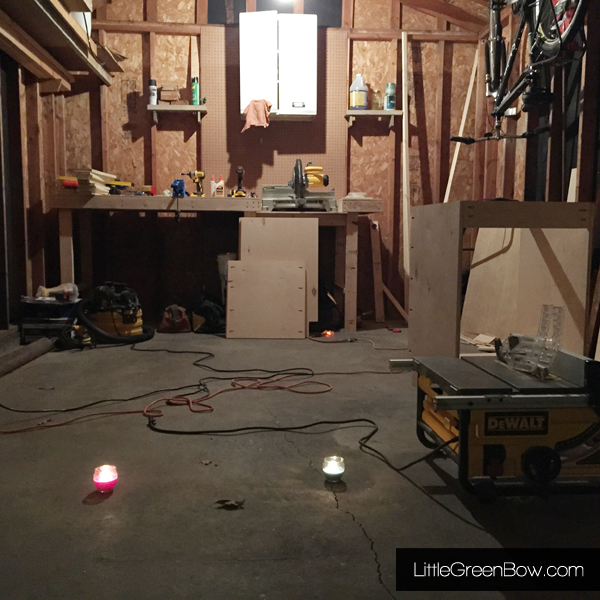
We only had time to complete the cabinet carcasses (think cabinet box) and the face frame on the sink base because it would have been too difficult to add after the sink was in place. So there is still a lot of cabinet work to do. Face frames, shelves doors, painting, and trim work, but it will get there eventually. In order to get these built, we built them after Eleanor went to bed. The mosquito-repelling candles made it a bit of a date night (or two). Ha! Perhaps we need to get out more often.
Once the cabinets were in place, we hooked up the plumbing. This of course required a couple more trips to the hardware store, but we were able to complete this step by ourselves. Plumbing was surprisingly straight forward. Just make sure you have the washers going the right direction and use Teflon tape for the metal connections.
Oh, and when you are working on any plumbing, be sure to turn off the water and triple check by running the faucet. Not that I know from experience (*grinning sheepishly). I may have mistakenly turned the water up instead of off and preceded to get water all over our kitchen. Thankfully towels, a supportive mom and a fast thinking husband helped remedy the situation quickly and there was no long term damage.
So, when my mom got here, we had 3 brand new working appliances, a bit more counter space than before, a working sink and some open shelves to put things on. Like I said earlier, it wasn’t pretty, but it was functional.
Here are photos from before and at our midway point.
Things still to do (some of these are new and did not pop up until we started the work):
- Remove the funky vertical shelf by the refrigerator
- Move the outlet by the range 4 inches to the left (it's currently just behind the range on the right side)
- Tile the backsplash
- Add the third countertop piece
- Finish the base cabinets
- Add face frames
- Make 3 drawers
- Make the trash pullout drawer
- Add a shelf by the range
- Make doors for the cabinets
- Paint them all white
- Re-attach the upper cabinet doors
- Add the handles to all of the doors
Wow! Writing it all out actually helps me feel less overwhelmed. I know there are like 15 steps within each of these bullet points, but the end feels like it's in sight. Just need to keep pressing forward.
Do you have any remodeling stories to share? Any words of wisdom or encouragement to help us along the way? I’d love to hear in the comments below.