
Furniture Makeover: Taking a Dresser from Horror Film to Fabulous
I love a good DIY furniture makeover and this dresser redo is no exception. When we moved into our apartment in Boulder we had a few more rooms to fill and thus needed more furniture. However, I'm not a big fan of purchasing new furniture. Instead, I prefer finding used pieces because it's more eco-friendly and they have more character. The trouble with that is they are usually super ugly to begin with. Take this dresser for example.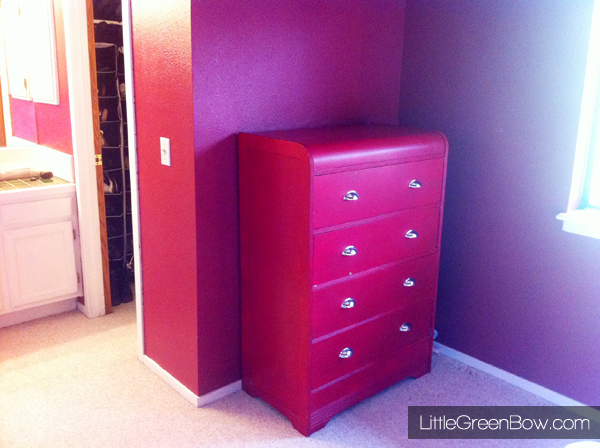 Wow, fire engine red! It's like we were immediately transported back to the late 90's. The good news was the dresser had great bones and was in good condition (with the exception of the offensive color). The drawer pulls had even been replaced so that was a big plus too. Hardware can get pricey, but paint is cheap. The best part was the price tag. I was able to negotiate the sellers down to $20. That's when the real fun began. I removed all the drawers and hardware and started sanding down the finish. Since I planned to paint the dresser white, I did sand off most of the pant. This turned out to be unnecessary, but it was one of the first furniture makeovers I tried so I went a little overboard.
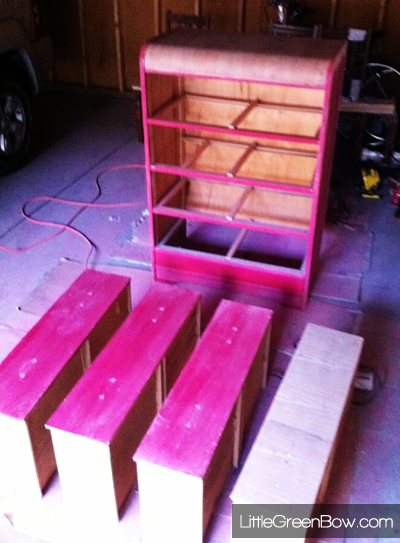 There was a lot of sawdust, so if you do this, don't forget to wear a face mask and glasses. You really do not want to breath this stuff in or get it in your eyes.Once I was done sanding, I went to town with the white paint. I painted every surface with a primer (some people are particular to one brand, but I find any quality primer will work). Once the primer was dry, I painted everything except the raised details with white high gloss paint that we had left over from painting the bedroom trim.Next, I covered all of the parts painted white with newspaper, taped it in place and used bronze spray paint to paint the raised detail and hardware.
 To give it a more aged look, I used the same can of polyurethane that I used to finish our table and thankfully there was just enough stain residue mixed in to gently tone down the white.
 The side panels were covered with a beige linen fabric. I used homemade "mod podge" (equal parts Elmer's glue and water - yep, you read that right!) to make the fabric stick. Since the edges were not perfect, and there was not enough contrast to the white, I added a dark brown ribbon trim around the edge using the "mod podge" again.I'm not going to lie, it was A LOT of work, but I am thrilled with the results!
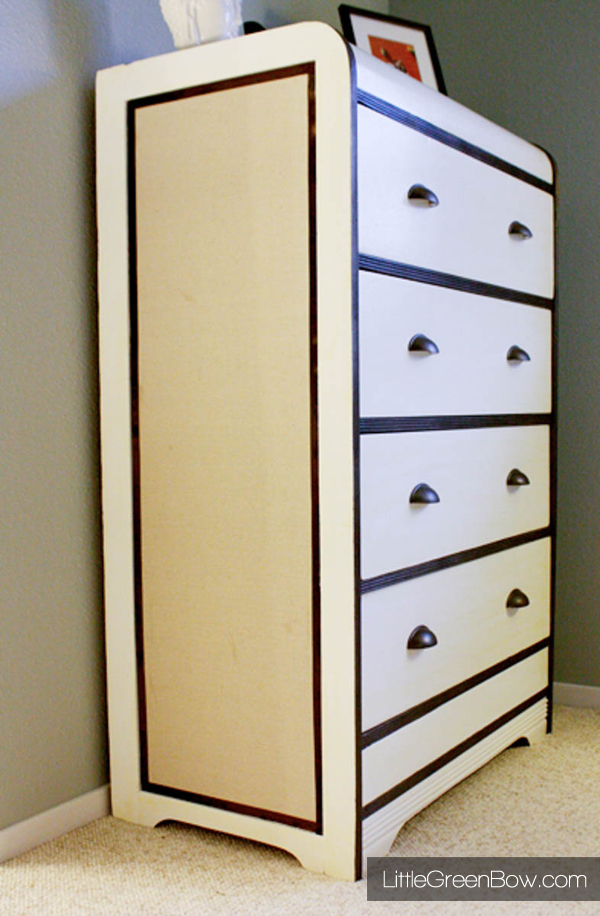 This turned out to be one of my favorite projects! I love how it turned out and it cost less than $30! ($20 for the dresser, paint from around the house, $3.50 for spray paint, $2 for ribbon, and $3.25 for fabric). Plus I was able to keep something out of the landfill. Do you have a project that makes you smile? Have you ever taken a hideous piece of furniture and made it beautiful again? If so, I'd love to hear about it in the comments below. And of course, make sure you pin this so you can reference it later.